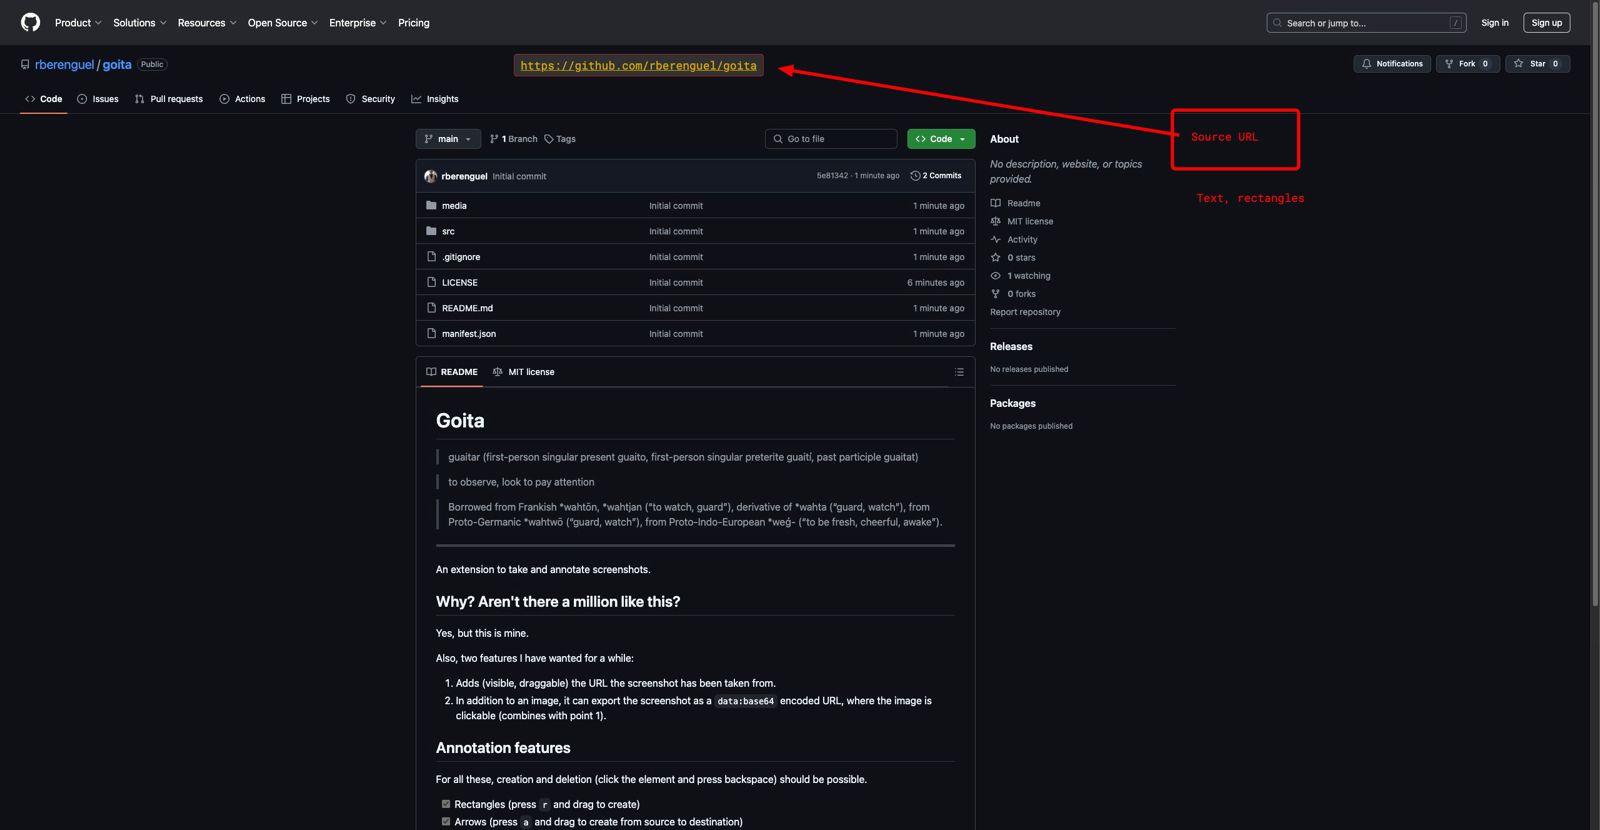
goita
Goita
guaitar (first-person singular present guaito, first-person singular preterite guaití, past participle guaitat)
to observe, look to pay attention
Borrowed from Frankish *wahtōn, *wahtjan (“to watch, guard”), derivative of *wahta (“guard, watch”), from Proto-Germanic *wahtwō (“guard, watch”), from Proto-Indo-European *weǵ- (“to be fresh, cheerful, awake”).
An extension to take and annotate screenshots.
It can also be used in a standalone way (eventually should work as a PWA) by visiting here. To annotate an image you have in your clipboard, press q, otherwise you can paste pieces of images using v. Depending on the browser you may need to click “paste”, or accept some clipboard access permissions. Use m to have fun with memes. You can see all memes available here (it’s also available from within the extension or the standalone help).
All images and text are processed locally, no data is sent anywhere.
Note It has not been thoroughly tested (manually) on Safari, but all seems to work:
- Tests pass.
- Pasting and adding arrows and stuff works.
Demo video for version 2.0
Click the image to open the video (youtube).
Why? Aren’t there a million like this?
Yes, but this is mine.
Also, two features I have wanted for a while:
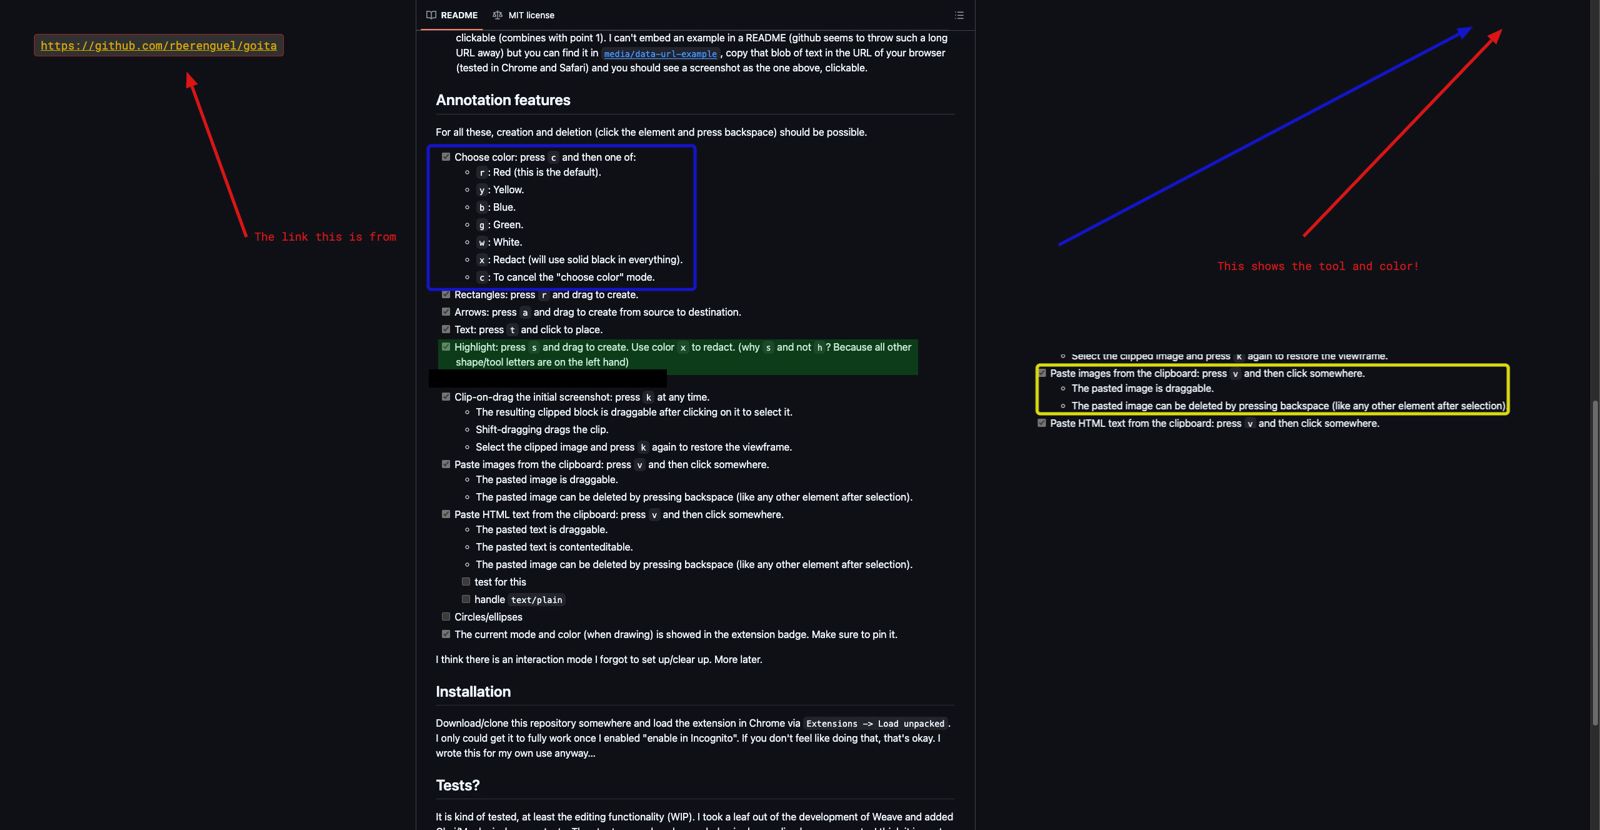
- Adds (visible, draggable) the URL the screenshot has been taken from. On a Mac, that is enough to go back to the source.
- In addition to an image, it can export the screenshot as a
data:base64encoded URL, where the image is clickable (combines with point 1). I can’t embed an example in a README (github seems to throw such a long URL away) but you can find it inmedia/data-url-example, copy that blob of text in the URL of your browser (tested in Chrome and Safari) and you should see a screenshot as the one above, clickable.
Features and functionality
Taken from the extension’s help modal. These are the default shortcut keys.
a: draw an arrowr: draw a rectanglep: draw an ellipses: highlight an areat: write textctrl + .: Make text larger (for this text block)ctrl + ,: Make text smaller (for this text block)ctrl + /: Cycle through fonts (Monoid, Reforma, Inter, Roboto)ctrl + wheel: Resize the text bounding boxctrl + c: Center the text in the bounding boxescape: will remove focus and selection from the text input
v: paste images or text from the clipboardctrl + wheel: Resize the pasted image while selected
Cmd v(orCtrl v, your system paste) to paste images from the clipboard- This is similar to the above.
k: clip the screenshotdrag: dragging moves the clipped imageshift+drag: dragging moves the clipping rectangle
q: swap the screenshot for whatever image there is on the clipboard (or go back to the screenshot)c: choose color for the next operationsr: red (default)y: yellowb: blueg: greeno: orangew: white. This makes the highlight tool a redaction tool.x: black. This makes the highlight tool a redaction tool.s: this switches opacity for the highlight tool from redaction to semi-transparent
m: enter meme selection, it will be placed on the last click and behave as a pasted imagetype: to dynamically search through the list of memestab: to display meme thumbnailsenter: to select the topmost memeclick: on the image or name to select itpaste: an external meme URL (should be valid) to use that insteadesc: to dismiss
z: switch between the screenshot and a white canvas (better for tweaking memes or diagrams)backspace: delete anything selected
Installation
- Download/clone this repository somewhere in your local machine.
- Enable ‘Developer mode’ in Chrome via the main menu, in
Extensions -> Manage Extensions. - Load the extension in Chrome via
Extensions -> Load unpackedat the root (wheremanifest.jsonandREADME.mdare located). More details here.
Tests
I took a leaf out of the development of Weave and added Chai.js/Mocha.js in-browser tests. They try to reproduce human behavior by sending browser events, creating arrows, dragging them, etc. I think it is neat, because I need no headless browser or anything heavyweight like that.
The main index.html holds several iframes with the individual suites per “functionality” (arrow, rect, etc), and you can also open the individual pages instead, or add new ones. You can see each test here.
If you want to run them locally:
- Start a local web server of some sort in the root folder of the repository (like running a basic Python web server with
python3 -m http.server 8000) and - Open the
tests/link there.
The way the tests work is:
- They “run” in a webpage that is pretty much like the one the extension presents, but with chai/mocha in-browser running.
- The div where the screenshot is shown is hidden behind a div, or just
display: none(depends on the test). - If you are changing stuff or developing a new test/functionality, you can display that and explore what is added and what not, confirming stuff works as expected “live”, in the test page itself.
There is no testing of the Chrome specific APIs, because there is little of them, and it’s kind of untestable.
- Generating images in
popup.jswhen pressing the extension button. - Changing the extension and badge title in
screenshot.js(behind a try with no catch to let this run in tests out of extension sandboxing).
The Taskfile.yml can be used to run the test-driven writing test for this README.
Local development, contributing
The most straightforward route if you want a feature or change stuff:
- Clone this somewhere.
- Load unpacked, as if you were to use it (it’s assumed you want to).
- Make sure you can run the tests as in the previous section (this requires running a local web server).
- Start changing code and trying changes. If you have a screenshot page (i.e. the one you can draw in after pressing the extension) open, refreshing it loads the most current version of your edited code.
As for contributing, this is one of my personal projects, and like many others I have, I have a clear idea of what I want (or a clear idea of what I don’t). So this is likely to follow whatever my whim is (in other words, I may reject pull requests for no good reason), but as an open source project, please fork, play with this and make it your own.
Credits
- Icons: Google Gemini
- Tests use the chai.js/mocha.js framework.
- Interact.js to get a hidden menu and potential mobile usage
- Added the following open source fonts:
- Added the free solid FontAwesome fonts
- Circular menu based on this CodePen by Chris McKenna